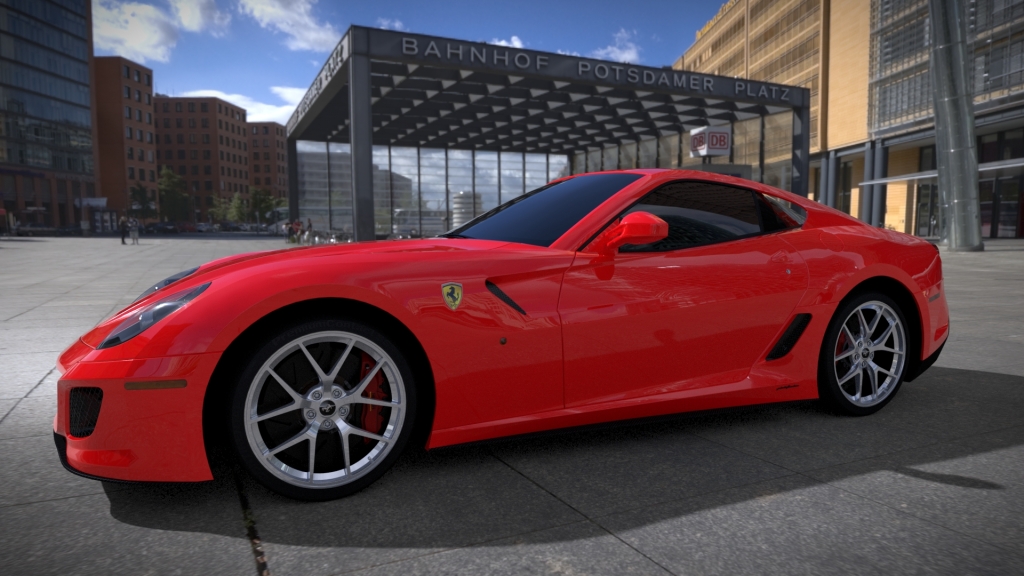
Ferrari F599 GTO exterior and interior rendered in Autodesk VRED 2015

[singlepic id=17148 w=800 h=540 float=center] [singlepic id=17128 w=640 h=480 float=center]
Text, animation and photos by Cor Steenstra
After my recent experiments using Autodesk’s VRED 2015 for the exterior of the 2014 Corvette StingRay, I wanted to find out how VRED would handle an interior. For that I used a detailed model of the Ferrari F599 GTO. The model was extensively detailed and had very detailed color maps assigned for the to make things more realistic, and I used those color maps in combination with provided VRED shaders to make a few variations of this interior. For exteriors I found the most realistic way to render a vehicle was to use the full global illumination settings. As you can see in the exterior details rendered with a night HDRi environment, as well as a day HDRi of the same location, this setting produces quite realistic results.
The use of the ‘headlight’ was switched off after the first 2 night shots, since it seemed to light up inside the cutlines, which was not as realistic as when switched off. It was tempting to switch the lights on for the car, since it was a night environment, but if you do that and want to get a realistic look, you need at least a little of glow switched on, which then also glows the highlights in the background HDRi.
That can be a bit overwhelming, so we left that out. When it came to the interior it was a harder task. It is logical in real life as well. An interior is inside of an exterior and therefore it is darker inside, and, with natural outside lighting, you get shadows in quite a lot of areas. To overcome that you can of course put lights at strategic places, but those lights can not be too bright so as to overwhelm the total picture, nor can they be to low to not have any influence. It is like setting up an interior for a real photo shoot, and, like the real shoot, it took a lot of experimentation before we could get a result I was happy with.
On top of that there is the issue with the type of rendering you use. A full global illumination uses everything, the placed lights as well as the outside environment, and renders all out accurately. Unlike an exterior, in an interior there are loads of visible nooks and crannies, and all need to be calculated accurately. That takes up time.
Naturally, in a big design studio of a big car company you can use the render farm that would most likely be installed, but not everyone has that sadly. Thus a calculation has to be made in what works well and how much time does it take. The only way to objectively make those decisions is by rendering test images, which we did of course. [singlepic id=17114 w=640 h=480 float=center]
The above image is one rendered with full global illumination switched on. It is very realistic in showing both what the inside lights do as well as creating shadow from outside. However, each image of this took well into 90 minutes to render even at a reduced 720P setting, compared to 3 minutes at full HD for the image below. That one was created using pre-calculated illumination plus shadows, baked in with ambient occlusion, set to medium level in all 3 options. [singlepic id=17104 w=640 h=480 float=center]
Looking at the image, to me I fully realize that it is not realistic in that it does have a quite even spread of lighting everywhere, but then, that is a good way of showing all of the interior. I know that real shadows are more true to life, but the ambient occlusion did do a good job in providing shadows, with out being to overtly dark in areas.
Looking at the fully ray traced image it does come across as very realistic, but, not only would I have had to spend a lot more time in sorting out the proper lights for this, to avoid the sort of flash light look it has now, I also would have to spend a lot more time on rendering the animation. At 30 frames per second on a 30 second animation, a 40 time longer rendering time does make a vast difference.
One other thing to consider is that VRED working on a detailed interior, when in RayTrace mode, becomes very slow to operate. You might end up waiting minutes just to change 1 setting in a menu. To overcome that you might want to set as much as you can prior to switching to the Raytrace mode. When it comes to ligh settings though, you can’t avoid doing that in Raytrace mode only, so that again will take time.


